 Aloud In The Cloud
How To Create Your Own Portfolio Online Under Your Own Name (2023) - Easy Step by Step Guide.
You want a professional showcase or portfolio to display your works online?
There are many artisans, creators and professionals who have always wanted to have a place online to place their works. A place to display and showcase their fantastic works to the outside world but have assumed such an endeavour is expensive or too technical to carry out themselves.
Well, I have good news for you. After going through this short step-by-by guide, you will have your handiwork displayed in it’s full glory under www.yourchosenname.com. Your portfolio under your own domain name!
Some people try to use free services like Behance, PortfolioOpen, Dribble etc, but most of these look similar and not very customisable.
Having a portfolio or a showcase hosted under your own custom name or domain makes you look more professional in the eyes of potential clients.
In this digital age, you are not in the competition if you don’t have an online presence for your works.
It is crucial you put your handiwork out there into the world. Fortunately, doing so has become cheap and very easy.
Requires no expertise to set it up.
This short guide will show you how to set up your own awesome portfolio online and get discovered by your next client.
For this guide, we will use a fictional photography shop called Smart Capture. Their photography subjects are: portraits, landscape, still works, animals, architecture etc.
We will have their portfolio set up on www.smartcapture .com
All you need is to register the domain name/web address(eg. www.smartcapture.com) you want to use to host your portfolio.
Registering and hosting your portfolio will not cost more than $4 per month. This is a small investment for a MASSIVE return!
Put your works out there and get discovered by your next big client.
How To Create Your Own Portfolio Online (2023) - Easy Step by Step Guide
- Register your portfolio domain name (eg. www.smartcapture.com)
- Install portfolio theme for FREE
- Add content to your portfolio
- Additional modifications (client testimonials,contact us etc)
1. Register your portfolio domain name/web address
In order to place your portfolio online, you will need to register the web address(eg. www.smartcapture.com) with a domain registrar and also get a small server space to store the content of the portfolio.
Decide which name you want to use for the web address. It can be your company name or your own name.
There are several domain registrars available but the one we recommend is BLUEHOST. They offer an easy setup process and also gives you a lot of discount(eg. FREE website security via SSL/HTTPS, FREE name registration etc). Bluehost also gives you a custom professional email address (e.g. [email protected]). Cool!

Disclaimer: We give a lot of tech tips on this website and in order to pay for server costs, we may get a small commission when you click some of the links in this post and proceed to sign up. This comes at no additional cost to you.
Create Account At Bluehost
Step 1: Once on Bluehost.com, select ‘WordPress‘ on the top left of page and select ‘WordPress Hosting‘

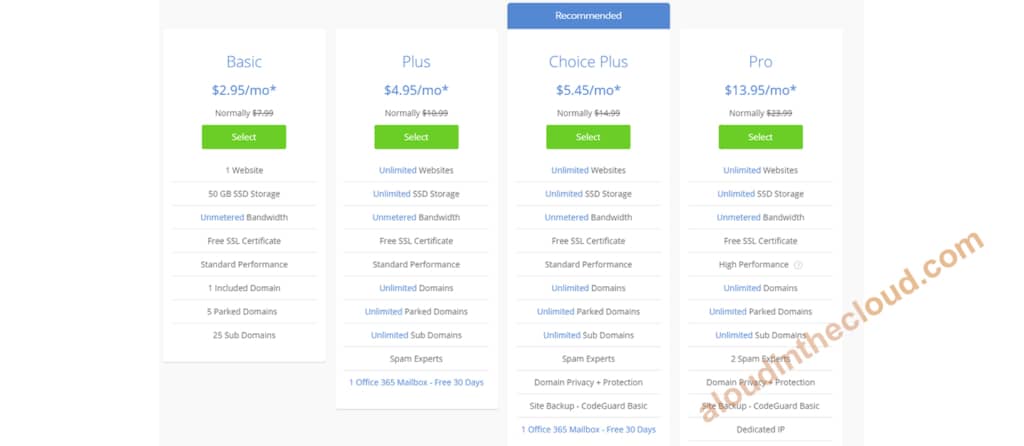
Step 2: Select the hosting plan. We will go with the Basic. Click on the green button under Basic
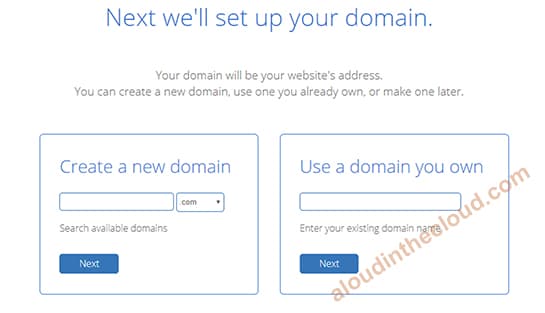
Step 3: Enter The Name To Register
In the first box that says Create a new domain, enter the name you want to use for your resume address(eg. www.smartcapture.com). Enter smartcapture without the www and .com. Click next.
NOTE: If you already have a registered domain, use the second box that says Use a domain you own.
Bluehost will check if the name you want to register is available. If it is not available it will suggest other variants but you can also modify the name slightly to what you prefer. If you are thinking of a name to use, make sure you register it now before someone else does.
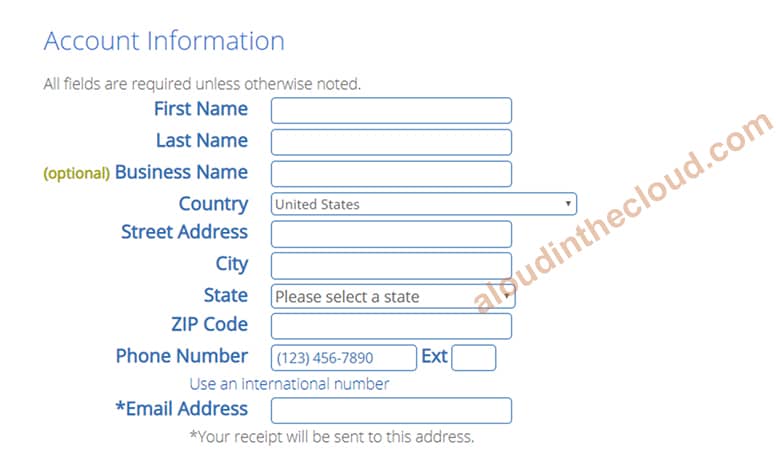
Step 4: Enter Your Details To Create Account
Enter your contact details
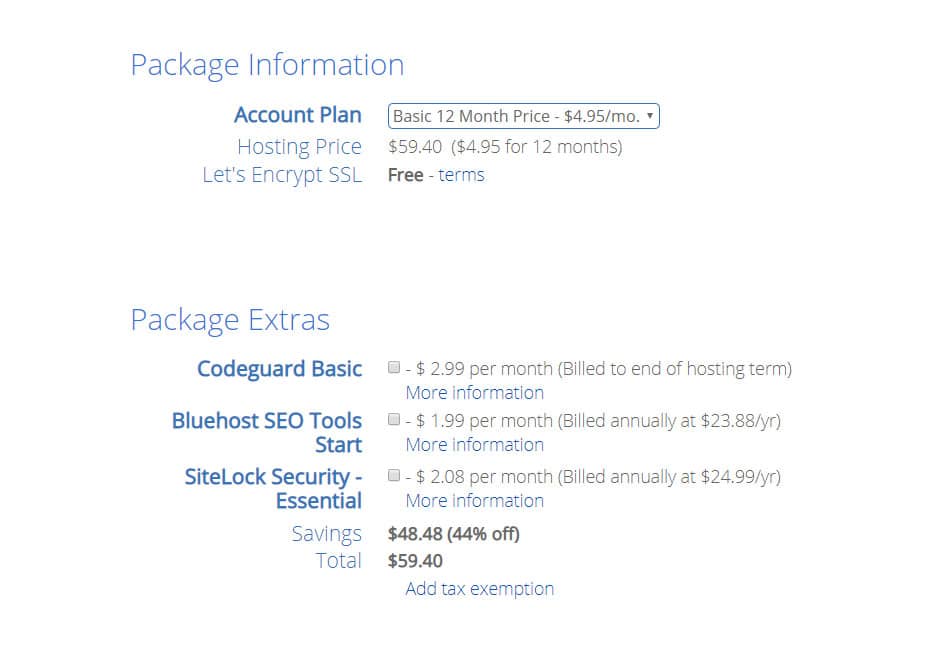
Step 5: Enter the hosting Package Information
NOTE: For the Account Plan, the cost per month gets cheaper the longer your commitment(ie 1 year, 2 years, etc). Decide which one suits you.
Uncheck all other options under Package Extras. We will not need those for now.
Step 6: Enter your payment details, click Submit to complete your registration!
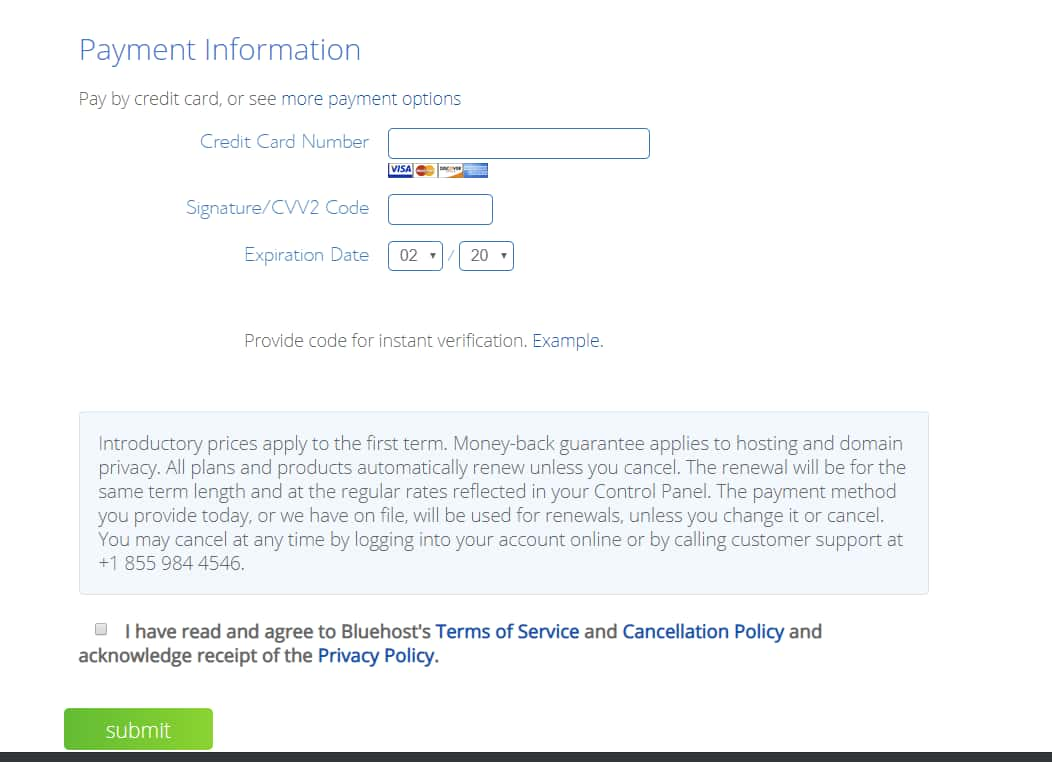
NOTE: Once you are done with this, Bluehost will proceed to install your portfolio platform(i.e WordPress) for you!! Follow the onscreen instruction.
Now that you’ve seen the steps, we’ll wait. Go create the account and come back here(if you’ve not already done so).
Take note of your Bluehost login details(i.e. username and password)
TIP: If you ever get stuck performing any of the steps here, the Bluehost tech support will gladly help you. They are one of the best in the business! Go to the Bluehost.com homepage, scroll down and you’ll see 24/7 Expert Support section. Click on the Chat link to get help!!!
Another bonus for being a Bluehost customer.

2. Install Portfolio Theme For FREE
Once you are done with your account setup, it’s time to set up your portfolio!
There are several FREE portfolio templates available: shapely, portfolioo, etc.
You can decide on the one to use, but for the purposes of this guide we’ll use the ‘Shapely‘ theme. It extremely flexible and powerful. Highly recommended.
How To Install Portfolio Theme
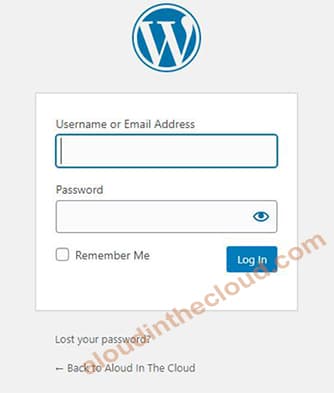
You’ll have to log into your Bluehost WordPress site to start your configurations and setup.
The log in page of your site will be found at www.yourchosenname.com/wp-admin (eg. smartcapture.com/wp-admin).
Enter your username and password to log in. (Contact Bluehost support if you can’t remember your credentials).
NOTE: You can also log into your wordpress dashboard by logging into Bluehost(using your Bluehost credentials) then selecting your site from there.
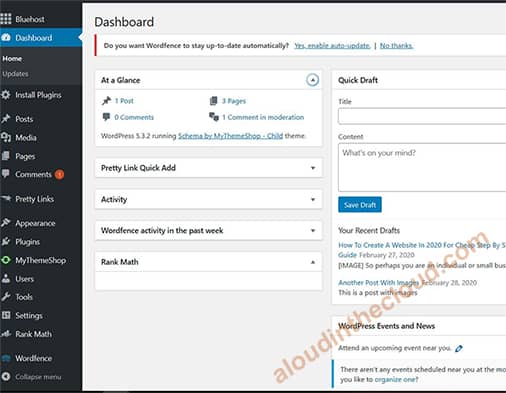
Step 1: Once you successfully log in, you’ll be taken to your site’s dashboard.
The black panel on the left is your dashboard menu. Click Bluehost (the first link at the top). Click Launch Site to activate your setup.
The dashboard menu has links to Posts, Pages, Appearance, Plugins etc.
Step 2: Install Required Plugins
Before we proceed we need to install a few required plugins. Plugins help us to easily perform various tasks, in some cases it’s the only way to perform a task.
We will install the following plugins.
- Classic Editor
- Jetpack (used with our theme to set up our portfolio)
NOTE: There’s a third and final plugin we’ll install after installing our Portfolio theme.
Installing Classic Editor Plugin
- Click on Plugins on the left dashboard menu. This opens the plugin page
- Click Add New(at the top left)
- At the right search field type ‘Classic Editor‘
- Click on Install Now on the Classic Editor from the search result
- Click Activate to activate the plugin

Installing Jetpack Plugin
Note: Bluehost should already install Jetpack plugin for you and you will only need to set it up. Otherwise, follow the above process used to install Classic Editor to Install Jetpack.
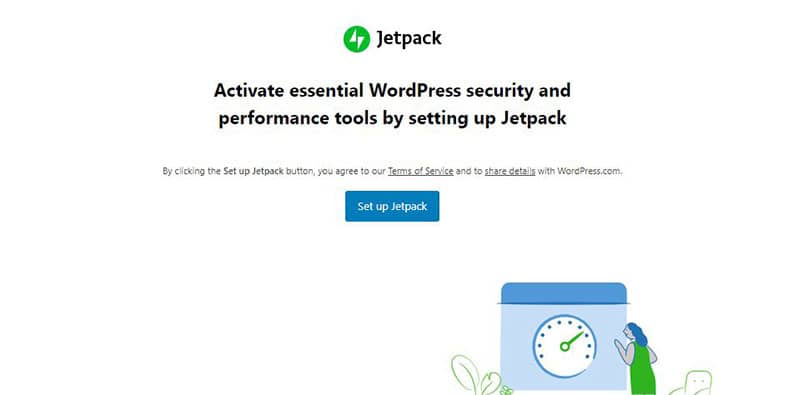
Setting Up Jetpack Plugin
Once Jetpack is installed, it will be found on the dashboard menu
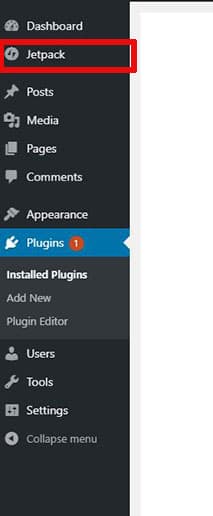
Click on Jetpack on the dashboard menu. Click Set up Jetpack on the next page
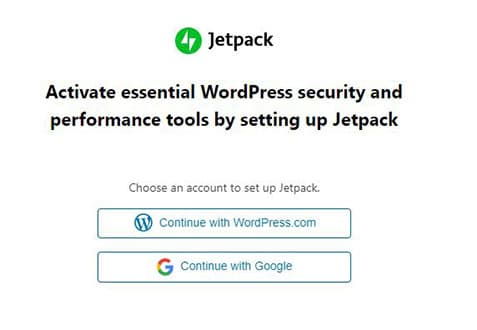
Signup with Jetpack using your Google account(you most likely don’t have a Wordpress.com account).
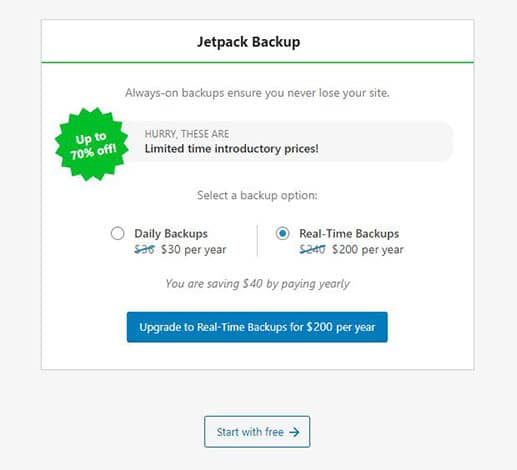
Jetpack has both paid and free versions. The free version works just fine for our use case. On the next page, scroll down and click Start with free
Back to the dashboard menu, click on Jetpack. Click Settings.
At the top of Settings page, click Writing on the top menu (where Security, Performance, Sharing etc tabs are listed).
Scroll down to Content Type section. Toggle Portfolios to activate it.
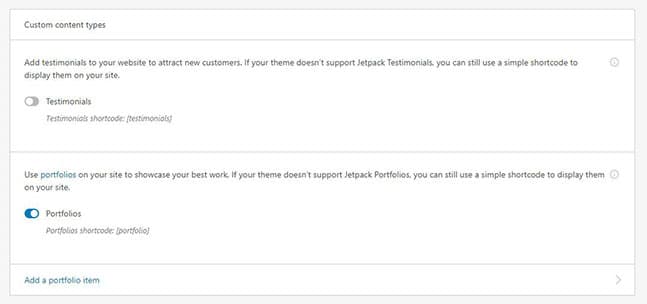
Once portfolio is activated, it will appear on the dashboard menu near Pages. We will use this later to create our portfolio page.
Step 3: Install Portfolio theme
Remember we are using the Shapely theme as our portfolio theme.
On the dashboard menu, hover over ‘Appearance‘ then click ‘Themes‘ to open the Themes page.
On the top left of the Themes page, click Add New.
In the search field(top right), type Shapely theme. This will bring up the Shapely theme.
Move the mouse over the Shapely theme and click Install.
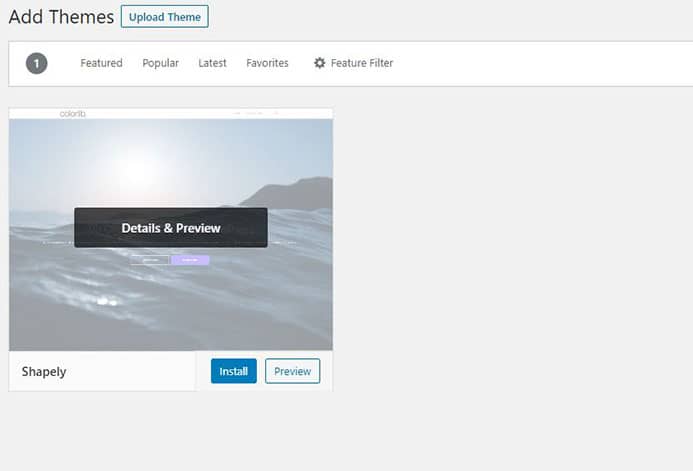
After installation, move the mouse over again and click Activate. This activates the theme for your site.
If you go to Appearance -> Themes on the dashboard, it should be the first theme listed and it should says Active:Shapely.
If this is not the case, look for the Shapely theme and click Activate.
Installing Shapely Companion Plugin
One last plugin to install is the Shapely Companion Plugin
- Click on Plugins on the left dashboard menu. This opens the plugin page
- Click Add New(at the top left)
- At the right search field, type ‘Shapely Companion‘
- Click on Install on the Shapely Companion plugin from the search result
- Click Activate to activate the plugin
Time to add your content!
3. Add Content To Your Portfolio
We’ve completed our setup so now it’s time to add our portfolio details. Our portfolio is for a photography shop so we will add portfolio works under Portraits, Landscape, Still Works, Animal, Architecture etc
Step 1: Set your company or site name
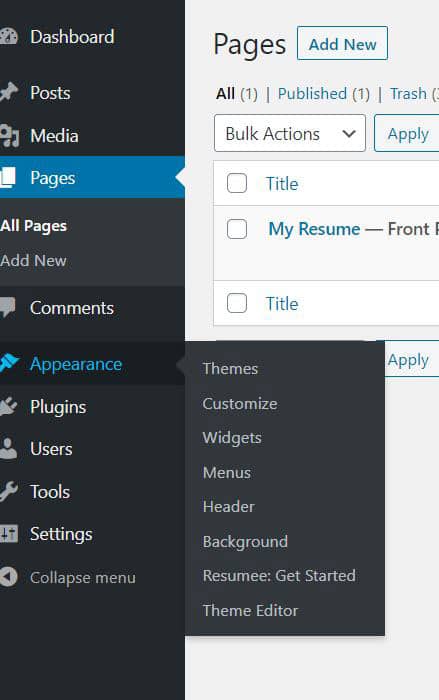
On the dashboard, hover over Appearance, click Customize.
Click Theme Options -> Site Identity. Under Site Title, enter your site name( e.g. Smart Capture). Click Publish at the top.
Click the x near the Publish button to go back to the dashboard view.
Step 2: Set up the frontpage.
On the dashboard, click Pages on the dashboard menu ->click Add New.
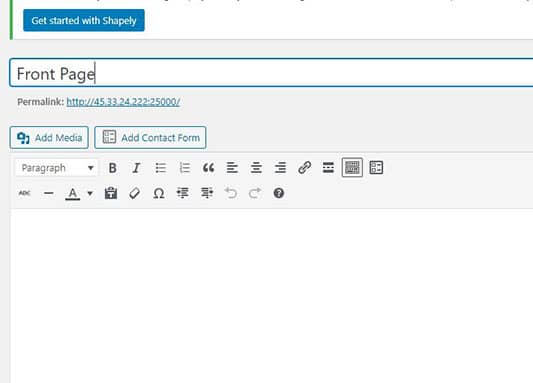
This is the editing page. The editing page has Title field and Content field. On the right side are extra content options
In the Title field enter a name. You can use any title but we are using Front Page here.
On the right side, under Page Attributes, select Home Page under Templates. Once done, click Publish (at the top). Or click Update, if you have previously published the page.
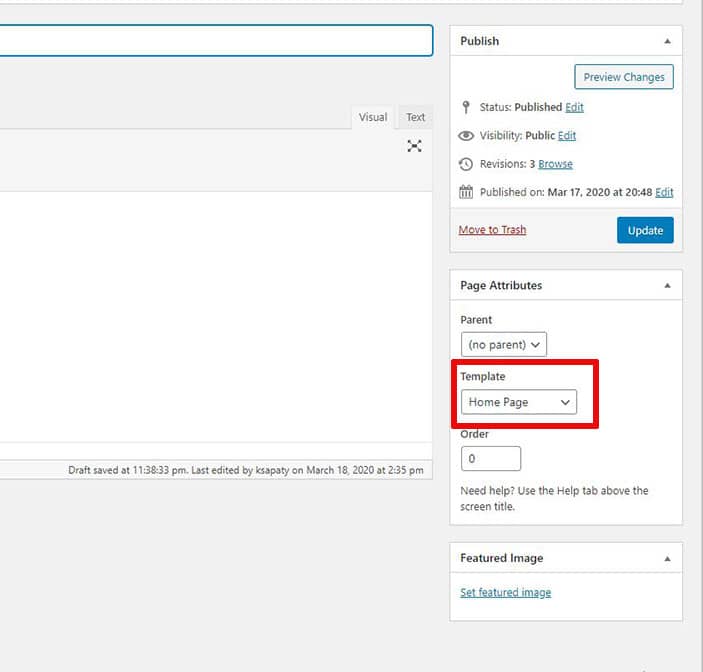
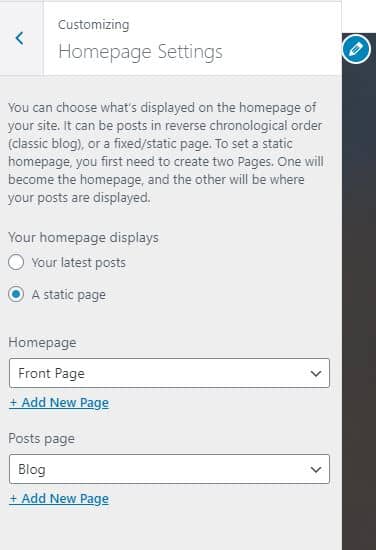
Configure page to be your site’s homepage
On the dashboard menu, hover over Appearance, click Customize.
Click Homepage Settings on the menus on the left. Click A static page under Your homepage displays
Under Homepage, select the Front Page page we created earlier. Click Publish at the top once done.
Go back to the dashboard view.
Adding Images To Your Portfolio
Let’s start by creating portfolio content for our Architecture work and add images to it.
You can organize your images under various what we call Projects. Since this examples are for a photography shop, we are organizing images under Architecture, Portraits, Still Life etc
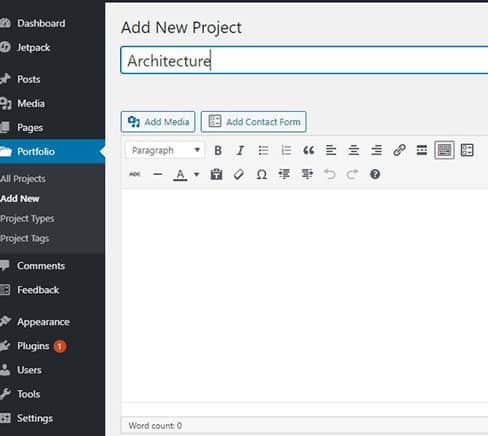
Step 1: On the dashboard menu, click Portfolio. Click Add New(top left new Projects).
This editing page is similar to the one for Pages. This is where you will be adding images and descriptions for your portfolio items
Enter Architecture in the Title field.
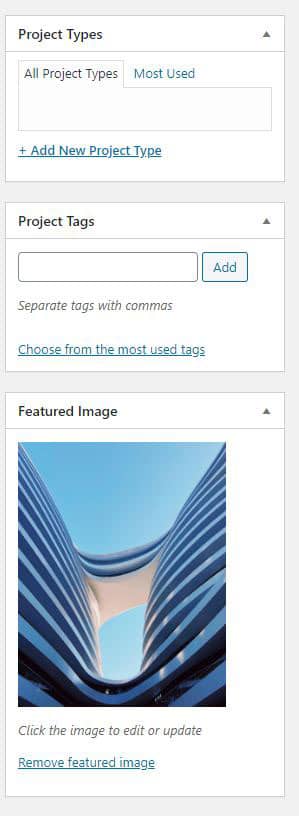
Step 2: On the right of the editing window, you will see Project Types, Project Tags and Featured Image sections
Project Type identifies the type of project(Architecture in this case)
Project Tags are labels you can assign to your portfolio(eg, Tokyo, New York etc)
Featured Image is the image displayed in the list of portfolio on your homepage.
Under Project Types, click Add New Project Type and enter Architecture
Under Project Tags, enter Tokyo
For Featured Images, click Set featured image, browse and select an image of your choice from your local machine. Click set featured image(bottom right)
Step 3: Add individual images for portfolio
Click Add Media (top left of Content field). In the pop-up window, click Upload Files. Click Select Files and browse on your local machine to add your first image!
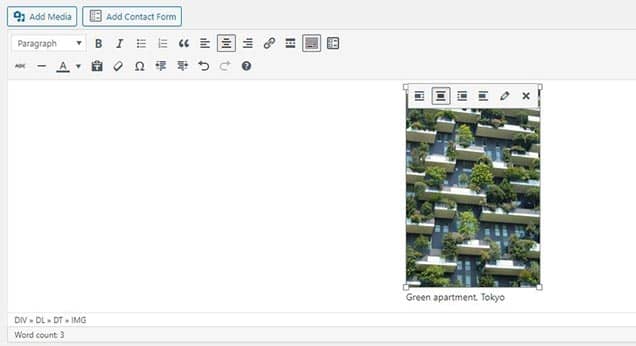
Click on the image to reveal a list of icons at the top. Center the image by clicking the second icon.
To add a description, click on the pencil icon, then enter description in the Caption field of the pop-up window. Click Update(bottom right) when done.
Follow the above process to add more images to the Architecture portfolio.
We will go ahead and use the same steps to add portfolio projects for Portraits, Still Life, Landscape, Nature etc
Step 4: Displaying Portfolios on the homepage.
Now that we’ve added our images to our various portfolios, we can now display it on our frontpage.
On the dashboard, hover over Appearance, click Widgets to open the widgets page.
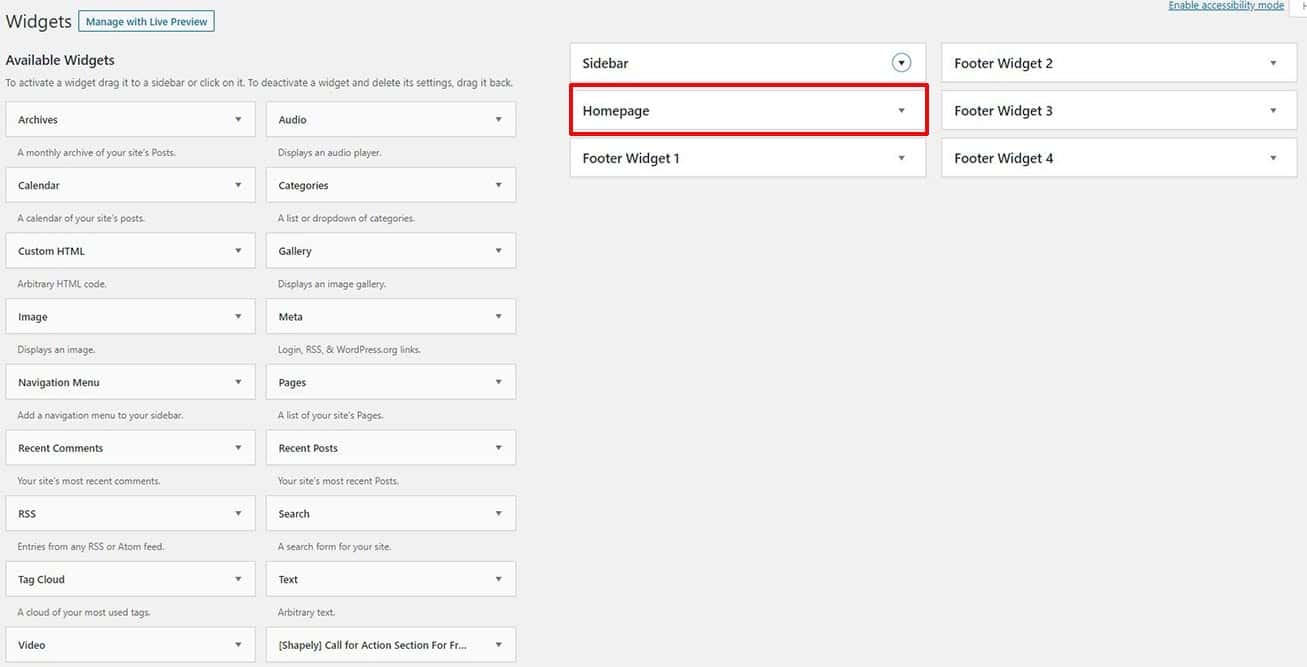
We will add the appropriate widgets on the left to the Homepage to create our homepage.
There are widgets for various items(portfolio, contact, call for action etc).
Since we are adding a portfolio to our homepage, look for [Shapely] Portfolio for Home Widget Section widget.
Click the small arrow on the right to expand the widget, select Homepage and click Add Widget.
This will add the portfolio widget to the Homepage widget.

Expand the Homepage widget by clicking the small right arrow. Expand the portfolio widget by clicking the right arrow.
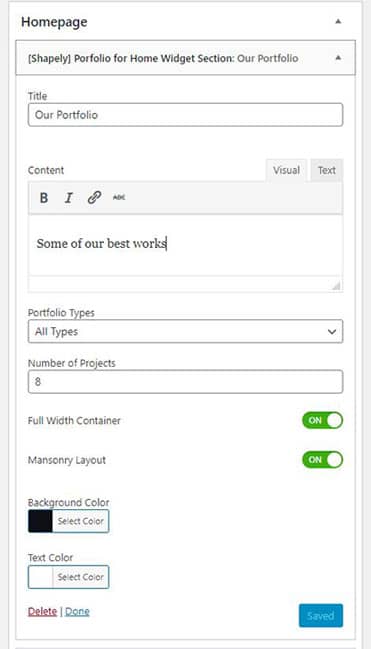
Type a title in the Title field. Type a description in the Content field. Click Save.
NOTE: If the Content field is not active, leave the widget page and navigate back to it (this seems to be some sort of a bug)
Step 5: Preview your portfolio
Visit www.yourchosenname.com (eg. www.smartcapture.com) to preview the changes made so far.
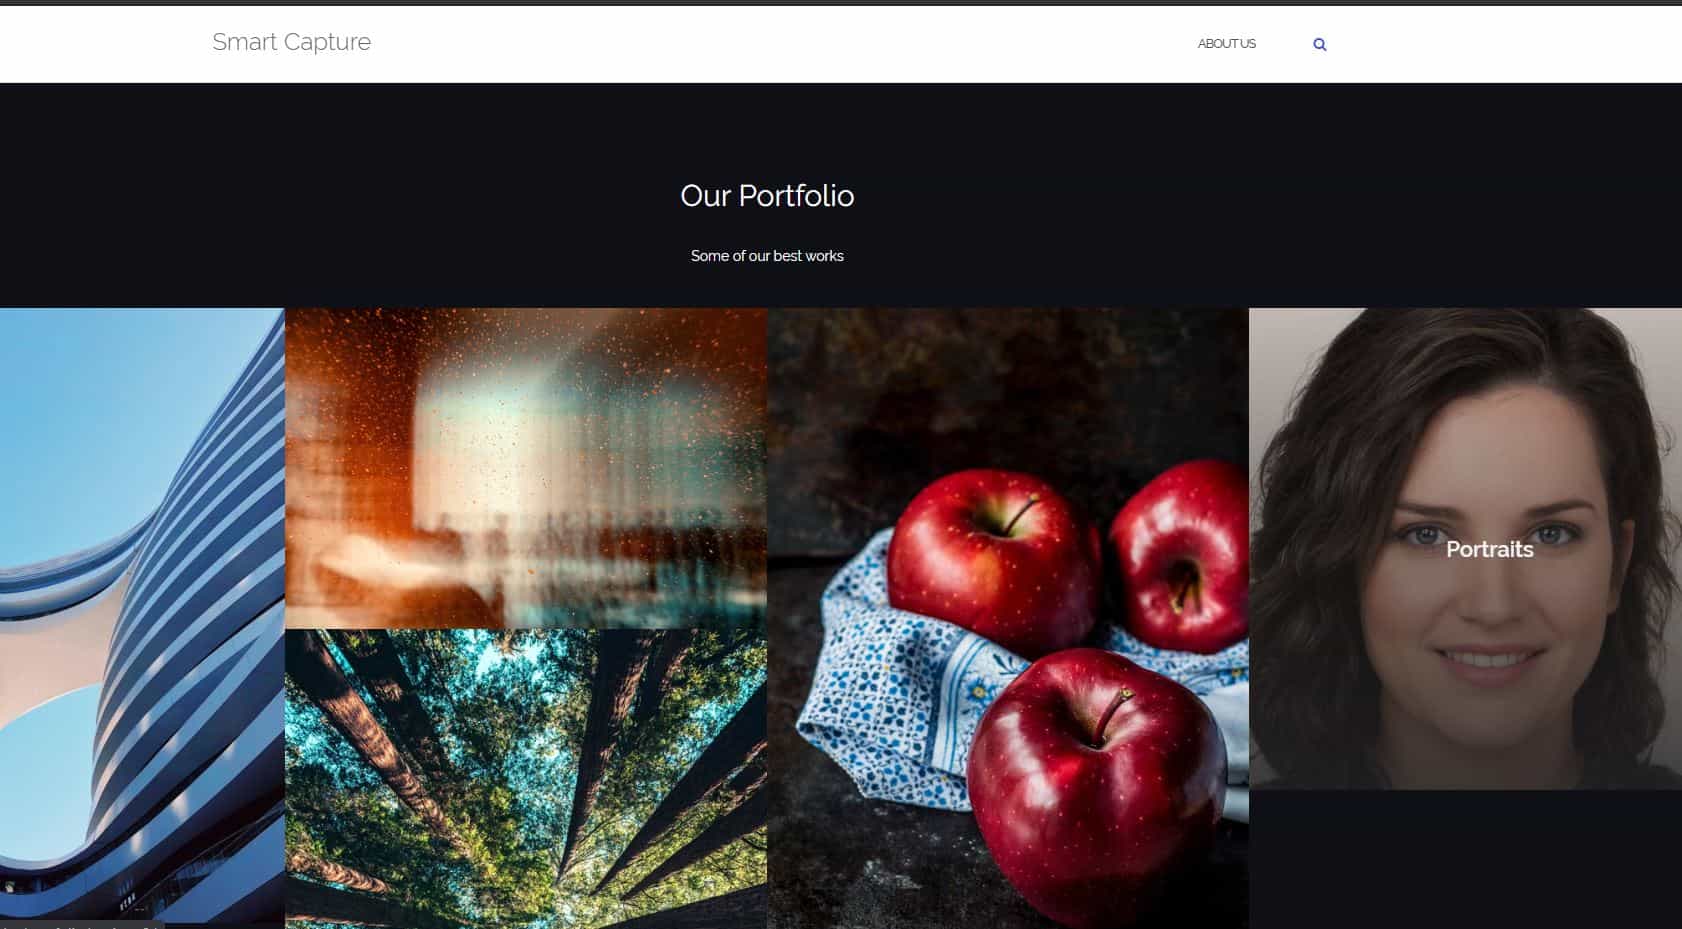
Congrats! All the portfolio projects added are displayed with their featured images.
Click on each to go through their individual images.
4. Additional modifications(client testimonials, contact us)
This section adds additional enhancement to the portfolio site. We will add contact information, an about us and client testimonials information
Add About Us Page
When you look at the top right corner of the portfolio homepage, you’ll see an ADD A MENU link. We will replace that with an About Us link that takes the visitor to a page where they can read a bit more about you or your outfit.
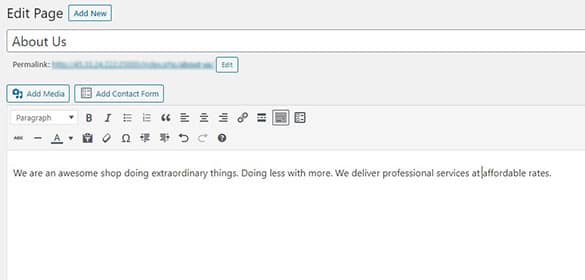
Step 1: Create a page for your ‘About Us‘ content.
On the dashboard menu, click Pages, then click Add New(top left). Change the Title field to About Us. Add information about you or your work in the content field.
Click Publish(right panel) when done.
Step 2: Add ‘About Us’ page to the top menu
We will create a menu and then add the About Us page to menu so it can be displayed at the top right.
On the dashboard menu, hover over Appearance, click Menus
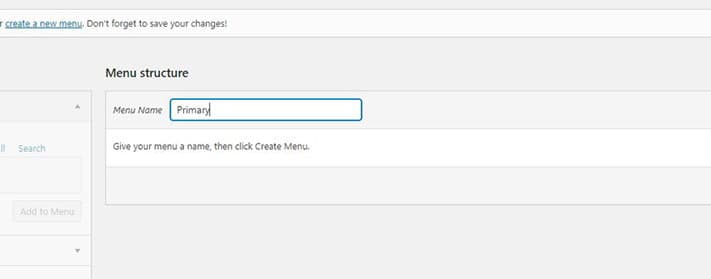
On the Menus page, click create a new menu

Enter Primary as the name of the menu. Click Create Menu(at the far right).
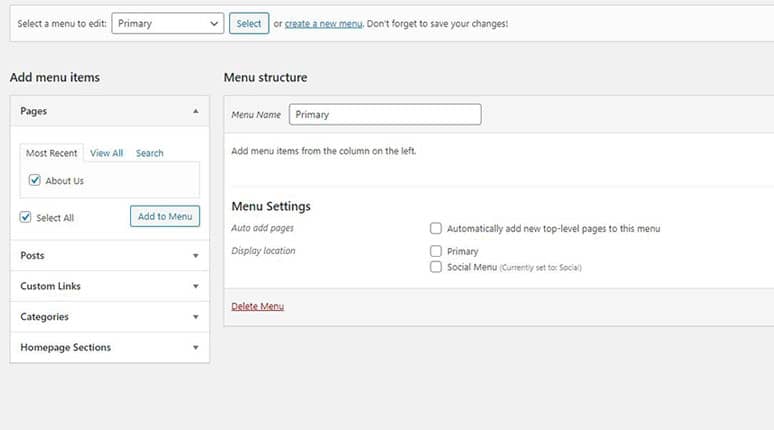
On the left under Add menu items, expand Pages
Select About us page, click the Add to Menu button. This adds the About Us page to Primary menu
Under Menu Settings, check Primary checkbox. Click Save Menu(far right).
Preview the changes by visiting the site again. You should see About Us replace ADD A MENU at the top right.

Add Contact Us Information
You visitors need to know how to contact you. Adding contact information is straightforward.
We will go back to using widgets to add contact information.
Step 1: Go to Appearance -> Widgets to go the widgets page.
Look for [Shapely] Contact Section For Frontpage. Expand, select Homepage and click Add Widget to add it to the Homepage
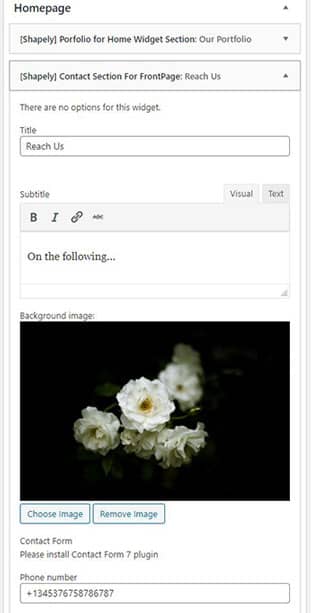
Step 2: On the Homepage widget, expand the [Shapely] Contact Section For Frontpage widget.
Enter Title(e.g. Reach Us) and a Subtitle of your choice
Add an image(use an image with a dark background).
Enter Phone number, Email and Address accordingly
Click Save.
The finished contact us section
 Contact us section
Add Client Testimonials
You can also let your visitors know the good things your existing clients are saying about your service.
We will add this again using the widgets.
The client testimonials are display in an animated slider.
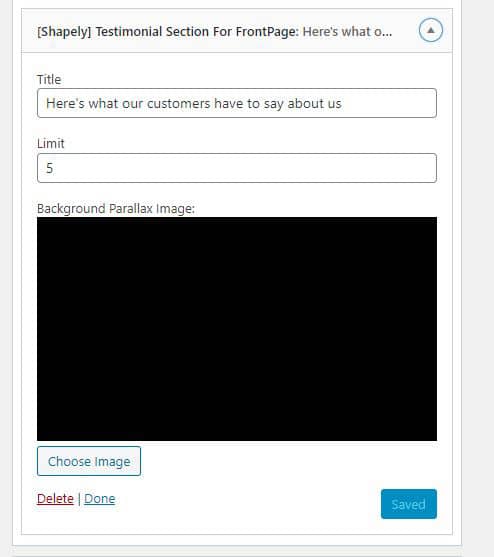
Step 1: On the widgets page, look for [Shapely] Testimonial Section For Frontpage and add it to the Homepage. Expand it.
Enter the Title(eg Here’s what some of our customers are saying about our service).
Select a background image(dark background preferred).
Click Save.
Finished client testimonial section

CONGRATS!!
Visit www.yourchosenname.com(eg. www.smartcapture.com)
HINT: The widgets you add to the Homepage widget can be rearranged by clicking and dragging accordingly.
Next Steps…
You can continue to edit and work on the portfolio content using the widgets and shape into what you want.
You can add parallax images, featured sections, add social contacts etc using the available widgets. Play around with it.
If you find this guide useful, kindly share it with your friends via email, social media so that they can also benefit.
If you need assistance with any of the following steps contact us: 
- SKS
Translations: French | Spanish | Portuguese
See also:
- How To Create A Simple Website
- How To Start A Simple Blog
- How To Modify Your Wordpress Child Theme
- How To Make Your Resume Stand Out
Portfolio Image Credit: Unsplash.com
Comments
comments powered by Disqus